The Chuan Yu 1:200 German Zerstorer Z43 (available her)
And AMT's 1:25 Subaru Brat pickup.
]]>First, some figures from Hasegawa-
Then the "Type T" lowrider kit, also from Hasegawa-
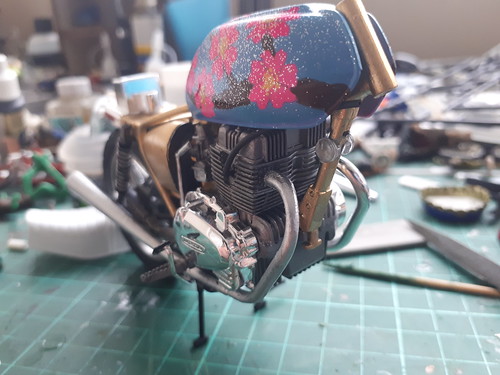
One of 2020's aims is to build and paint more figures, to improve my skills, so this is as much a placeholder for me as a resource for you.
Alternative Images - USA Film and fantasy resin kit figures. Some dead image links, so I don't know how up to date it is.
Andrea Miniatures - One of the world's premier figure manufacturers. You can get Andrea figures on Amazon.
Armorcast - USA Fantasy and Wargame figures
Miniaturas by F. M. Beneito - Spain Historical Miniatures specialist
BNA Model World - Australian model shop. More than just figures.
W Britains - Military figure manufacturer
Bronze Age Miniatures. 28mm and 54mm figures, mostly for gaming.
Creative Beast. Mostly dinosaurs, but some fantasy figures.
Le Cimier - France Military Figures, tools and reference books
Denizen Miniatures - 1:43 motor racing figures- drivers, pit crew, etc, - and 90mm fantasy and sci-fi figures.
Devils Own Resin An interesting selection, but no obvious buying links.
Dragon Models - USA Home page of Dragon Models.
Dream Master Creations - USA Erotic resin figures
The Dunken Company - figure casting supplies and moulds.
Dutkins' Collectables - Among the many products sold by this company are figure models.
El-Greco Miniatures - A shop with a wide range of companies stocked. I have bought from them in the past, and will do so again.
El Viejo Dragón Miniaturas - Spain Historical Figure specialists
Fontegris Miniatures. The Fontegris site has been taken over by a beauty product retailer. This is a list of their products at Noble Knight games.
Frontline Figures - Beautiful 54mm award winning collectible figures!!
Germania Figuren 1:72nd figures in resin and pewter, as well as 3D printed items in various scales and even 3D files for home printing.
Gremlins in the Garage! - USA Welcome to Gremlins in the Garage the first webzine dedicated to figure kit modeling
Ground Zero Games. Gaming miniatures and fantasy figures.
Wayne "The Dane" Hansen - Figure Kits and Sculpting Supplies
Hassle Free miniatures Gaming figures and accessories. Great figures, mostly in 28mm. I own a few, and love the company's sense of humour. The models are great sculpts, and tongue was firmly in cheek when most of the names were thought up.
HaT Industrie - HäT Industrie produces 1/72 and 1/32 scale soft plastic military miniatures or toy soldiers. Our goal is to produce a line of figures not produced by any of the past or present manufacturers.
Historex Agents - UK Historex Agents represents over 70 different companies, specialising in connoisseur model soldier kits and AFV conversion set
Hobby Search - buy direct from Japan
Image Anime - USA General Anime kits and figures
Jimmy Flintstone/ Dr Flintbone Primarily manufacturers of hot rod and custom car bodies in resin, Jimmy Flintstone also produce figures to complement the vehicles. Dr. Flintbone is the more adult arm.
Kaiyodo - Japan Star wars, Godzilla (original) and Anime figures.
King & Country - Design and manufacture the most amazing (and affordable) range of toy soldiers, miniature figures,military vehicles, model aircraft and buildings in the world today! All our products are hand-made and hand-painted to the highest professional standards.
Kings X Toy Soldiers - Models from various toy soldier manufacturers, plus an exclusive range of Alamo figures
Legends - Kits, accessories, reference materials, Japanese si-fi & anime, from all over the world.
MBM Models - Holland Military, Sci-Fi and Fantasy fig specialists
Micro Mark - tools for the serious modeller
Mic Shaun's Closet - Plastic figures from many periods to include Napoleonic, American Civil War, Alamo and World War II from a variety of manufacturers.
Minutemen Toy Soldiers - USA Military figure kits and gaming specialists
Mithril Figures - Ireland Mithril was founded in 1987 and has been dedicated since then to the creation of miniature figures, inspired by J.R.R. Tolkien's world of Middle-earth as portrayed in his famous works "The Hobbit" and "The Lord of the Rings".
Moebius Models. Licenced re-releases of old Aurora kits.
Monsters In Motion: A Sci-Fi Gallery - Welcome to Monsters In Motion, the world's greatest gallery of Science Fiction, Fantasy, Horror & Famous Movie Personalities as finished statues and model kits for the hobbyist and collector.
Paleocraft - models of extinct animals
Pegaso Models - Italy Manufacturers of 54mm, 75mm, and 90mm figures.
Prince August Factory Shop - Ireland Military figures for the collector, together with moulds and Chess sets
Quarter Kit - France White metal and diecast military miniatures
Reaper Minis - Minis, paints, and more.
Ronin Miniatures - Based in Ukraine, and trading through an Etsy shop, Ronin produce figures primarily in 54mm/1:32.
Saratoga Soldier Shop - USA Pewter Civil War and American revolution figures
Sideshow Inc - USA Site specializing in liscensed figurative vinyl/resin model kits and collectibles based on some of todays leading artists, including: Clive Barker, Bernie Wrightson, Tim Bradstreet, Frank Kelly Freas, Brom, and Bill Stout.
Der Sockelshop German webshop stocking Modern Armies In Miniature, and others.
Spectral Motion Inc - This company sells some amazing horror figures!!
S & S Models - UK 1:76 scale model figures, games and accessories
Stockade Miniatures, Inc - USA "Soldiers of the World" figures, plus metal and plastic figures from a variety of manufacturers
Styrene Studio - Excellent resin figures
Tedtoy Miniatures Online - USA Civil War Military figure specialists
The Toy Soldier Company - The Toy Soldier Company featuring the sales of toy soldier figures, sets, books and accessories
Valiant Enterprises. Figures and wargaming miniatures.
Watson Sculptures and Models - Dinosaur, Ancient reptile and Prehistoric figures and models
Zotz - Mexico Glamour and Erotic figure specialists
]]><center><iframe width="560" height="315" src="https://www.youtube.com/embed/P3Sxe17BI0M" frameborder="0" allow="accelerometer; autoplay; encrypted-media; gyroscope; picture-in-picture" allowfullscreen></iframe></center>
Products featured in the video can be found here.
]]>I've made a couple of videos already, and I'm likely to make more. The exact timetable will be worked out as I go along, but, for now, some timelapse I shot over the last two weekends.
1- Putting some figures together, so I can practice figure painting-
<center><iframe width="560" height="315" src="https://www.youtube.com/embed/5_OwrVErvjQ" frameborder="0" allow="accelerometer; autoplay; encrypted-media; gyroscope; picture-in-picture" allowfullscreen></iframe></center>
2- Diving into the big box of dismantled Gundam I won on eBay, and seeing how many I can put back together-
<center><iframe width="560" height="315" src="https://www.youtube.com/embed/Xyudcds8tHE" frameborder="0" allow="accelerometer; autoplay; encrypted-media; gyroscope; picture-in-picture" allowfullscreen></iframe></center>
More coming soon!
]]><center><a data-flickr-embed="true" data-footer="true" href="https://www.flickr.com/photos/spinneyhead/albums/72157713425894268" title="Atomic Gas"><img src="https://live.staticflickr.com/65535/49640769116_b7e19928db_c.jpg" width="800" height="655" alt="Atomic Gas"></a><script async src="//embedr.flickr.com/assets/client-code.js" charset="utf-8"></script></center>
This little service station is a model from Sarissa Precision that I picked up at the Britcon show in Manchester last year. It's my first laser cut wood kit (if you don't count the bed I got the same day), and I'm impressed.
I went overboard with the weathering and debris, but it is meant to be a post apocalyptic location, after all. The transfers came from a bunch of locations- some were old bus advertising from my Dad's model railway stash, others were sold for nail art, and the graffiti comes from a Judge Dredd game, and my own designs.
Now I need a post apocalyptic game to play, so I can use this location.
]]><center><a data-flickr-embed="true" data-footer="true" href="https://www.flickr.com/photos/spinneyhead/albums/72157712177881767" title="My first Gundam build"><img src="https://live.staticflickr.com/65535/49210238463_512650bf94_c.jpg" width="800" height="481" alt="My first Gundam build"></a><script async src="//embedr.flickr.com/assets/client-code.js" charset="utf-8"></script></center>
Next on the modelling table is my first laser cut building kit.
]]>
First project of the year is the Honda CR-X kanjo-style racer. The Fujimi kit has gone together well so far, apart from needing to clamp the front subframe as the glue set. I have now reached the point where the chassis is complete, and so is the interior. But it's being put aside for a while, until I get my hands on the colour shifting paint I want to use on it.
Not the best image of the interior. I shall try to get a better one. This build, as well as utilising a wing and steering wheel from parts sets, has been detailed with bits from the Spinneyworld JDM Interior Parts set, and the Street/Track Racer set, and will sport the JDM Style Door Mirrors when complete.
The CR-X album is here, with more photos, and some commentary.
Whilst the CR-X awaits its paint, I've moved on to project 2 of the year- My First Gundam!
This is not the giant battle suit I had originally bought to be my first Gundam, because I got another one cheap on eBay, and decided to have a practice on that one first. I should have some of the scribing tools and detailing parts from the store by the time I start on the second build, so I'll be able to see how they change the experience.
After watching *a lot* of Gundam build videos on YouTube, I have some ideas of what I'm going to do. First off, I'm welding all the seams, then cleaning them up. Then I'm going to look at improving the existing panel lines and maybe scribing some new ones. But I'll still head off on my own tangents quite often.
One such tangent happened when I had a look at the shield, the back of which was far too flat and empty. I dipped into my tubs of old kit bits and 'greeblies', and added a ring and other pieces, to give it some depth. Few other parts will get this level of added texture, but I had fun adding all of this.
The Bosozoku style Honda Hawk is finally finished, and now I can properly move on to 2020's projects. I'm rather proud of it, even if the flaws and mistakes inherent in it being my first (characteristically over enthusiastic) motorbike model are obvious on close inspection. For example, there is no way a boso rider would sport a full face helmet, but it's there to cover up the shoddy join between the saddle and its oversized back.
See the full gallery below (or maybe have to click on it to go to Flickr, depending upon how temperamental the embedding is being).
So, I'm challenging myself to make more models in 2020. Particularly ones where the build utilises my own products or stock.
The first three are lined up, and ready to go.
Build 1 will be this Fujimi Honda CR-X.
The recently added Street and Track Racer Parts set was designed, in part, to provide bits for this build. I'm aiming for a mix of track day toy and street racer, with definite nods to Kanjo racers and their like.
Build 2 will be a Gundam.
I know next to nothing about Gundam. There's a mythology, games, and who knows what else. I just want to build a giant robot. One of my new distractions is watching Gundam build videos on YouTube, and I am inspired to detail up the model, and pose it in a diorama. I don't have any specific 3D printed stuff to go with it yet, but the scale is 1:144, so it will work with N gauge/ 10mm wargames buildings and models.
Build 3 will be a Land Rover. Or maybe several Land Rovers. I have the Italeri 1:24 fire truck, as well as their 1:35th 109", and Revel's 1:35th soft top. If I pick up Revel's new 1:24th offering as well, I may try to build it and the fire truck side by side.
That's the current plan. I'd love to be organised, and do a build a month. But I'm realistic, and I know how a plan like that soon comes unstuck, so we'll see.
]]>Painting the tank took more masking than I'd ever done before. I'm happy with the lotus flowers that resulted, though I am showing you the side where a section of paint didn't lift off with the tape and require bodging with a brush.
Also shown in the last photo are the Croc Jaw foot pegs. Future builds will likely use a higher proportion of Spinneyworld products, but this one only features the pegs and the Ape Hanger handlebars.
The bike started to go together, in short bursts. I didn't get the engine in the right place, though, and that had a bunch of knock on effects. Such as problems lining up the chain. Which were compounded when I glued it to the side of the engine block.
The foot pegs look good, though.
After a certain amount of faff, the exhausts went on. The kit shares parts with another model, so there were actually two exhaust options available to me. I went with the non-standard ones, but had to do some bodging, filing and cutting to get them working. The left hand pipes are a mashup of the chrome ones intended for the kit, and the longer alternative ones I wanted to use. Check out the gallery for a longer explanation.
The handlebars have finally been ordered from the printer, and the bike should be finished soon after they arrive. Check back soon to see.
]]>The discount applies from the time a new product is listed, until the first batch is delivered. Qualifying products get a discount of 20%. You'll have to wait a little longer for delivery, but you'll be amongst the first to get the model, and I'll be able to expand my range.
This is an automatic discount, applied to qualifying products at checkout, so you don't have to remember a code to use it.
]]>I'll be buying both, and measuring them up for components and add ons. I've already done a roof rack for Italeri's 1:35th kit, I ought to do one for its big brother.
The Italeri arrived today, and I did a quick unboxing and took some photos. Check out the gallery embedded below, or click through to Flickr.
Sorry for the blur in some of the photos. I thought I'd try out the SLR, rather than use the phone camera. It was surprisingly dark, and it had issues focusing on the sprues.
The model is curbside (surely hedgeside, as it's an offroader), so there's no engine detail. It can be built left or right hand drive, and, unlike the 35th scale version, remembers to tell you which side to put the breather vent. There's no obvious flash, and few sink holes or ejector marks. There are a couple of moulding tabs on the front of the roof that will need removing, but they're the largest issues.
Sprue D is made up of Fire Truck parts. If I do build the kit, I'll probably be ignoring it, and using the bits I design and get printed. But if you are going to use it, it contains a lot of neat bits. The water pump in particular is nicely detailed.
I'll be doing a comparison of this kit to the Revell one when it arrives. In the mean time, I'm going to design some add on bits.
]]>It's also my first bike model, and, being me, I'm building it custom. Bosozoku are Japanese biker gangs (the most common translation I've seen of the name is "running tribe"), who have developed their own style of customising for cars and bikes. On bikes, it manifests as chopper style handlebars, exaggerated seat backs, and aero fairings lifted up so far they're more likely to detract from the bike's dynamics. Intricate paint jobs are common as well.
I'm going to be copying the seat and handlebars for this build, and trying out some new paints and techniques. The fairing may be beyond me, unless I get lucky on eBay. The handlebars will be designed by me for 3D printing (not started yet, need to get that done), and I'll also be using some of the foot pegs I designed recently.
The model I'm working on is Aoshima's 1978 Honda CB400T Hawk II, which I ordered from Hiroboy.
The first thing I did was glue the frame together, and the main parts of the engine block.
Whilst the frame went together nice and true. the connection pins for the lower half of the engine block were vague, and, no matter how I lined them up, there was a very obvious seam, which I later had to file down before fitting other components. The two carburettors were similarly tricky to align.
Boring black wouldn't do, so the frame got a coat of gold paint. Wilko own brand rattle can, in fact.
The engine block, and the wheels, got a coat of Citadel Iron Hands Steel, and I learnt that my airbrush doesn't work very well with a rotted seal on the air hose, on one of the most humid days of the year. Luckily, the paint's just there to enhance the colour the plastic was supplied in. Those seams I mentioned were filed down, the chrome covers were attached, and the gaps between the fins were enhanced with a little Citadel Nuln Oil.
The next job is to get the chrome off the footpegs and their mountings. I've already tested oven cleaner on a bit of sprue.
Then the pegs will be replaced with these. The 'Croc Jaw' pegs, from my very own range.
I had a moment of inspiration whilst sorting through the mess on the workbench. I've bought a number of nail file sets from the pound shop, to use as cheap sanding sticks. They may turn out to be too coarse, but some of them are the exact shape I need to build the seat back. Even better, there are three different sizes of them. I cut out a plastic card back, then glued three of the sticks to it, using a combination of superglue and PVA. The next step is to use filler to build up a smoother cushioned shape, and then fit it onto the back of the kit seat.
The fuel tank is in the spray booth (which is a plastic crate on its side on top of the fridge, for the time being). I shall do a grand reveal of the paint scheme it's getting in the next build report.
]]>This week's deigns are spun off from a motorbike project I'm about to begin, if not immediately usable in it. For a while now, I've wanted to build a bosozoku style bike. I purchased the base kit last month- an Aoshima 1978 Honda Hawk II CB400T- so it's time to start work on the accessories it needs.
Except, I'm easily distracted.
A bosozoku bike will usually sport a pair of chopper style ape handlebars. Whilst searching for reference to base my design on, I found a different pair of handlebars, and made them instead. The Clubman bars are suited to hardcore cafe racers and ton-up machines. Don't let the picture fool you, they're not risers. They've been rendered the wrong way up. The curve doesn't lift the bars up, but is supposed to drop the bar ends down, so that they're on a level with the bottom of the fuel tank, and the rider can get down into an aerodynamic position.
They're available in plastic or aluminium. At the moment, I have to order them on demand from Shapeways, but I will endeavour to get some in stock for a quicker turn around, and possibly a lower price.
Another cool looking accessory that isn't very boso, is the bar end mirrors I designed yesterday. They're more modern sport bike than cafe racer or Japanese gang. I shall be ordering in a batch, and making them available here and at the ebay shop primarily.
Next up is foot pegs, which are mostly inspired by chopper photos, but will be closer to the theme of the build that either of the previous two designs. I've been scribbling designs, and taking measurements, and shall be getting on them soon.
]]>